FiboFilters offers multiple UI elements for product filtering. We use a primary filter element called “Categories” and a variety of facets, including “Checkboxes,” “Radio list,” “Number Range,” “Toggle,” and more.
Although we use the terms “filters” and “facets” interchangeably, if you wish to gain a better understanding of the differences between these terms, you can refer to this post.
Adding a new filter/facet
To add a new filter/facet:
- Navigate to
WooCommerce > FiboFilters -> Filters - Click the “New filter” button
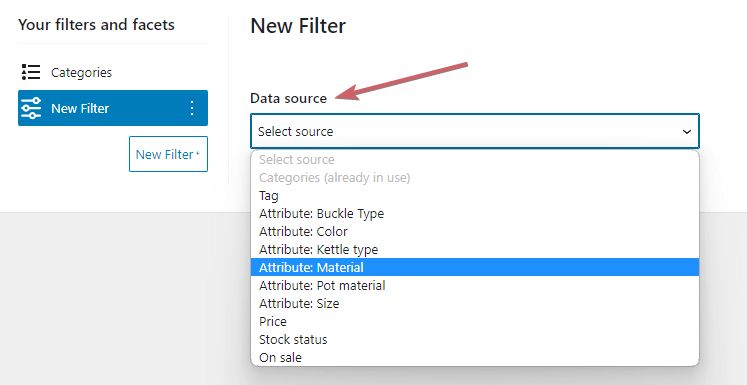
- Open the “Data source” dropdown and select the desired source for filtering
Step 1 – Selecting data sources

Filters can be built based on multiple data sources. The primary data sources include categories, prices, product attributes, and others. FiboFilters supports the following product data sources:
- Product categories
- Price
- Stock status (in stock / out of stock)
- On Sale
- Product tags
- Product attributes
- Featured
- Product brands
- ACF
- Custom filter sources
The selections made from each available data source are analyzed to determine their nature and determine types of applicable filters.
For example:
- A Number Range filter for numeric values
- Checkboxes or Radio lists for string values – the Number Range filter will be automatically hidden
- A Toggle for boolean data sources
Analyzing sources could be a resource-intensive operation. You can disable it by the following PHP snippet:
add_filter( 'fibofilters/analyse_source_value_types', '__return_false' );
ⓘLearn how to add this snippet to your WordPress.
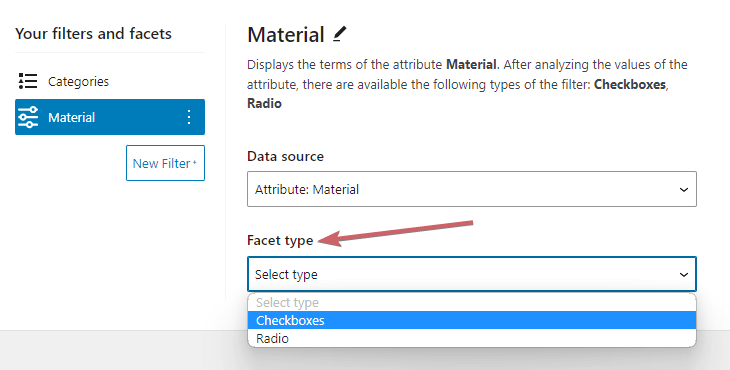
Step 2 – Selecting a filter type
In most cases, after selecting a data source, another dropdown menu called “Facet type” will appear. Depending on the chosen data source, the most relevant filter types will be displayed.

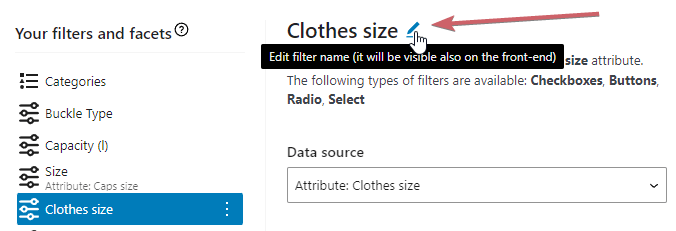
Editing filter name
The name of the filter can be changed. You can display a different filter name on the front-end than default one. To do it, click the “pencil” icon, edit the filter name and save the settings.

Creating a complete list of filters
In the creator, you need to make all the filters that fit your store and products. Don’t worry if the filters apply to different product categories – they will only be displayed in the matching, contextually relevant views.
The filters are always cross-matched with the displayed products to ensure relevance. FiboFilters algorithms prevent the presence of filters that do not match any products in your store’s current catalog.
For example, in the “Laptops” category, your customers will see a “CPU manufacturer” filter, but the same filter will not appear in the “Displays” category. This ensures that the filters displayed are specific to the product category. Read more about content-aware filters.
Displaying the filters
You need to specify where the filters should be displayed in your store. You can do this by going to the settings of the WooCommerce plugin -> FiboFilters -> General (tab) -> Filter location. A detailed guide on embedding filters in your WooCommerce store is available here – How to add FiboFilters to your website?